Installing RapidLoad
Minimum Requirements
- WordPress version 5.0 or Above
- PHP version 5.6 or Above
- A working WP-Cron
Downloading RapidLoad
After purchasing a RapidLoad license, you can download the plugin directly from the Thank You page or via this link.
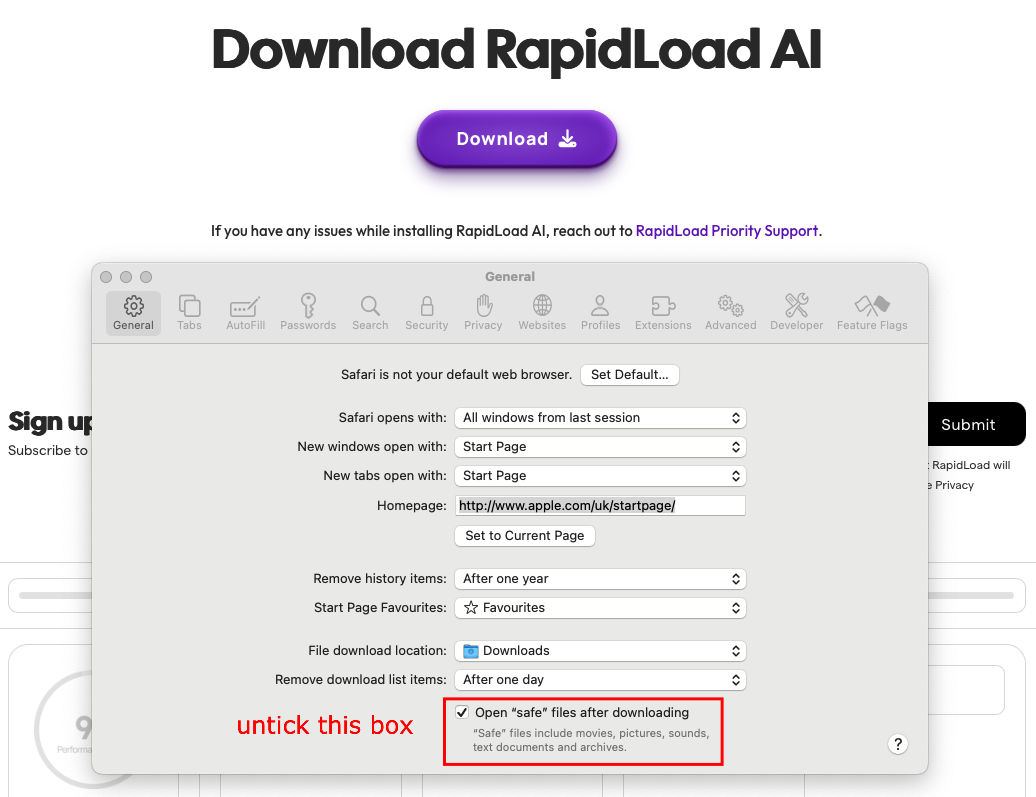
Important Note for Safari Users.
Safari may automatically unzip the downloaded file, which can cause issues during installation. To prevent this, you can either manually re-zip the file or disable automatic unzipping by following these steps:
- Open Safari and go to Settings.
- Uncheck the option “Open safe files after downloading.”
This ensures you receive the plugin as a ZIP file, which is required for installation via the WordPress dashboard.
RapidLoad can be installed using two methods: Automatic Installation and Manual Installation.
Automatic Installation
The easiest way to install RapidLoad is through your WordPress dashboard. Follow these steps to install:
- Log in to your WordPress admin panel.
- Navigate to Plugins -> click Add New and click Upload Plugin.
- Select the RapidLoad ZIP file and click Install Now.
- When prompted, confirm the installation, and WordPress will automatically complete the process.
Manual Installation
For manual installation, you will need to upload the plugin files to your web server using an FTP client. Follow these steps:
- Unzip the RapidLoad archive.
- Upload the RapidLoad folder to the
/wp-content/plugins/directory on your server. - Log in to your WordPress admin panel and activate the plugin from the Plugins section.
The RapidLoad plugin is now installed and ready to use
Can’t Install/Upload RapidLoad plugin
When uploading the RapidLoad plugin via the WordPress dashboard, you might encounter this error:
“The uploaded file exceeds the upload_max_filesize directive in php.ini.”
This happens when the plugin file size exceeds the server’s upload limit.
How to Fix This Issue
Manual Fix
It’s possible to increase the upload limit using one of the methods below. The method that works may vary depending on your server setup and hosting provider. You don’t need to edit all these files simply find the one that applies to your site.
In the examples below, “64M” represents a 64MB file size limit. You can adjust this value as needed, but avoid setting it excessively high.
Important: Before making any changes, ensure you back up your files.
- Modify .htaccess (For Apache Servers)
Add the following lines at the end of your .htaccess file (located in the root folder of your site):
php_value upload_max_filesize 64M- Edit php.ini (If You Have Access)
If you can access your server’s php.ini file, update:
upload_max_filesize = 64MRestart your web server if needed.
- Update wp-config.php
Add this line to your wp-config.php file:
@ini_set('upload_max_filesize', '64M');Quick Fixes
- You can Install the RapidLoad plugin via the FTP
- Use a plugin: Install WP Increase Upload Filesize or Increase Maximum Upload File Size to adjust the limit.
- Contact your hosting provider: If the issue persists, request an increase in the
upload_max_filesizelimit from your hosting provider.
How to Check the File Size Limit
To confirm if the upload limit has increased:
- Go to Media → Add New in your WordPress dashboard.
- Check the Maximum upload file size displayed below the upload area.

Updates & Rollback
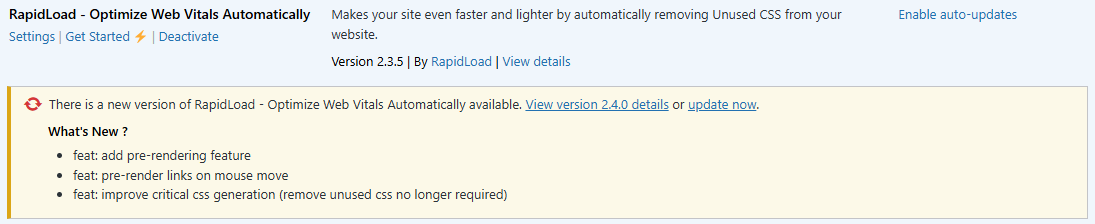
How to Update
- Go to the Plugins page on WordPress
- Locate RapidLoad in the list of installed plugins.
- Click the “Update Now” to apply the latest update.
If an update is available, you’ll see a notification, as shown in the screenshot.
Rollback
- Install this rollback plugin.
- Select and revert to your desired version.
You can view the changelog here to pick the appropriate version.
Uninstalling RapidLoad
- Navigate to the Plugins section in WordPress and locate RapidLoad.
- Click “Deactivate.”
- A pop-up will request feedback please provide it to help us improve RapidLoad.
After deactivation, all page-specific RapidLoad configurations will be cleared, though global settings will remain intact.